How to Convert HEIC to JPG Without Losing Quality
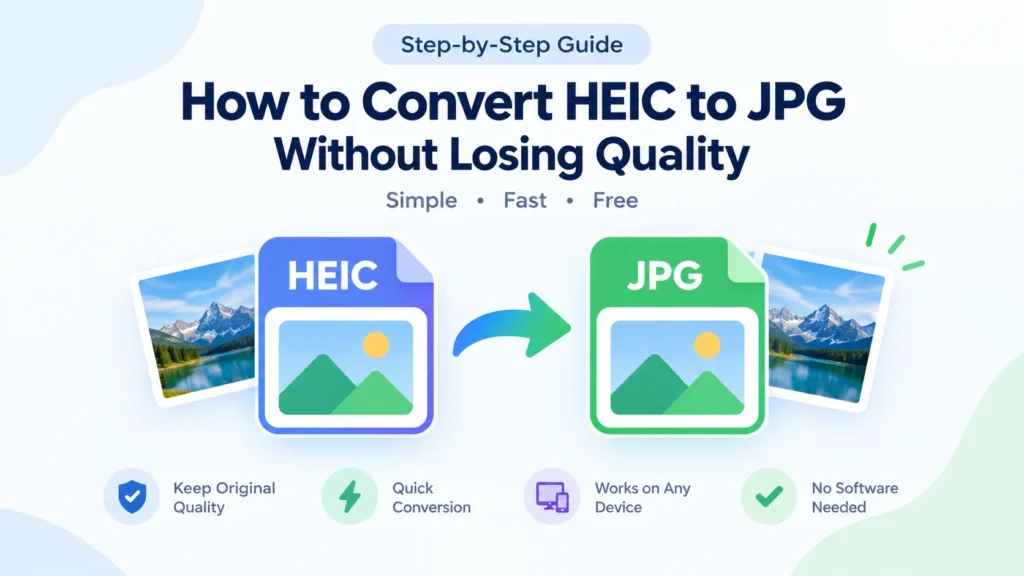
How to Convert HEIC to JPG Without Losing Quality
Convert HEIC to JPG at quality 90 — no visible loss. 6 methods compared: browser-based (no upload), iPhone settings, Mac, Windows, CLI, and cloud.
The title of this page is slightly dishonest, and so is every other article ranking for the same phrase. JPG is a lossy format. Converting anything to it discards data — that is what lossy means. The question is not whether quality is lost, but whether the loss is visible. At JPG quality 90 or above, it is not — not at screen size, not in print, not in a side-by-side comparison at 100% zoom unless you are pixel-peeping gradients in a controlled environment.
That is the practical answer: set quality to 90, convert, and the result is visually identical to the original HEIC. The rest of this page is six ways to do it, tested, with the trade-offs of each laid out so you can pick the one that fits.
Why HEIC exists in the first place
HEIC is Apple’s name for a photo stored in the HEIF container using HEVC (H.265) compression — the same codec behind 4K video streaming. Apple switched the iPhone camera to HEIC in iOS 11 (2017) because HEVC compresses roughly twice as efficiently as JPEG’s 30-year-old DCT algorithm. A 12-megapixel iPhone photo that would be 3.5 MB as a JPEG is about 1.7 MB as HEIC, at the same visual quality.
That is a genuine technical win. The problem is everything outside the Apple ecosystem. Windows does not preview HEIC without an extension. Many web upload forms reject it. Print shops cannot read it. Email clients sometimes strip the attachment. Android support varies by device and version — it is not reliable across the board even in 2026.
Converting to JPG solves all of that at once, because JPG opens on essentially every device, app, and service that has existed in the last three decades.
What “no quality loss” actually means
HEIC stores your photo in 10-bit colour (1.07 billion colours) using HEVC compression. JPG stores it in 8-bit colour (16.7 million colours) using DCT compression. The conversion is not a straight container swap — the image is decoded from HEVC and re-encoded as JPEG, with a colour depth reduction from 10-bit to 8-bit.
At quality 90 or higher, the practical effect is:
- Colour banding in smooth gradients: theoretically possible, functionally invisible in photographs.
- Compression artifacts: present but below the threshold of human perception at normal viewing distances.
- File size: the JPG will typically be 0–30% larger than the HEIC, because JPEG is a less efficient codec at the same visual quality.
- Metadata: depends on the tool — some strip EXIF data, others preserve it.
The Quora answer that circulates on this topic — “you can’t convert anything to JPG without losing quality” — is technically correct and practically useless. The question people are asking is whether the conversion will ruin their photos. It will not.
| Setting | What happens |
|---|---|
| JPG quality 100 | Maximum size, minimal compression. Overkill for photos — the file is larger than the HEIC. |
| JPG quality 90 | The safe default. No visible difference from the original at any normal viewing size. |
| JPG quality 80 | Smaller file, slight softness in fine detail visible only at 200%+ zoom. |
| JPG quality 70 | Noticeable artifacts in smooth gradients and skies. Fine for web thumbnails, not for printing. |
| JPG quality 60 or lower | Visible blockiness. Avoid unless file size is the only thing that matters. |
If you are converting photos you care about, 90 is the number. If you are converting screenshots or documents, 80 is fine. Below 70, you are making a trade-off you can see.
The six methods, compared
| Method | Runs on | Batch | Quality control | Photos leave your device | Install required |
|---|---|---|---|---|---|
| Browser-based converter (no upload) | Any device | Yes | Yes (slider) | No | No |
| iPhone Settings → Most Compatible | iPhone | No* | No | N/A | No |
| Mac Preview / Quick Actions | macOS | Yes | Yes | No | No |
| Windows Photos / HEIF extension | Windows 10/11 | No | No | No | Extension |
| CLI (ImageMagick / libheif) | macOS / Linux / WSL | Yes | Yes (exact) | No | Yes |
| Cloud converters (iLoveIMG, CloudConvert, etc.) | Any device | Yes | Varies | Yes | No |
* The iPhone setting changes how future photos are saved. It does not convert existing HEIC photos.
Method 1: Browser-based converter — no upload, no install
This is the method that works on every device, right now, without installing anything or creating an account.
A browser-based converter that runs locally decodes your HEIC file inside the browser using a JavaScript HEVC decoder, converts it to JPG at your chosen quality, and hands you the result. Your photo never leaves your device — the conversion happens on your own machine.
The trade-off: the first file takes a few seconds while the decoder library downloads. After that, conversion is near-instant.
What to look for in a browser-based converter:
- Quality slider — if you cannot set the JPG quality, you do not know what you are getting. Some tools silently compress at 70 or 80.
- No file-count cap — many “free” converters limit you to 5 or 10 files, then paywall the rest.
- File size comparison — both the original HEIC size and the converted JPG size should be visible before you download, so you can judge the trade.
- Batch and ZIP download — converting one photo at a time from a library of 200 is not a real solution.
- No upload — if the tool requires an internet connection after the page loads, your photo is being sent to a server. Turn off Wi-Fi after the page loads and try again. If it still works, it is genuinely local.
Our own HEIC to JPG converter runs entirely in the browser — quality slider (90 default), no file-count limit, no watermark, batch with ZIP download, and both file sizes shown per image. The test: turn your Wi-Fi off after the page loads and convert anyway.
If you need lossless output for editing, HEIC to PNG keeps every pixel. For the web, HEIC to WebP produces the smallest files. For combining several photos into a single document, HEIC to PDF does that in the browser too.
Method 2: Change your iPhone settings (future photos only)
This prevents the problem for photos you have not taken yet. It does nothing for your existing library.
Settings → Camera → Formats → Most Compatible
From that point on, the iPhone camera saves JPG instead of HEIC. The files will be roughly twice as large — that is the storage cost of using JPEG’s less efficient compression — but they will open everywhere without conversion.
Two things to know:
- This does not convert existing photos. Your camera roll is still full of HEIC files. Those need one of the other five methods.
- The storage impact is real. A 256 GB iPhone holding 20,000 HEIC photos at ~1.7 MB each uses ~34 GB. The same photos as JPG at ~3.5 MB each would use ~70 GB. That is the difference between half your storage free and a quarter of it free.
For most people, the better approach is to leave the camera on HEIC (save storage, keep 10-bit colour) and convert individual photos when they need to leave the Apple world.
Method 3: Mac — Preview and Quick Actions
macOS has two built-in methods, neither of which requires any install.
Preview (single or batch, with quality control)
- Open one or more HEIC files in Preview. Select all, right-click, choose Open With → Preview.
- If working with a batch, choose Edit → Select All.
- Choose File → Export, or Export Selected Images for batch conversion.
- Set Format to JPEG. A quality slider appears — set it to 90% or higher.
- Choose a destination folder and save.
Preview preserves EXIF metadata and gives you precise quality control. This is the best built-in option on any platform.
Quick Actions (batch, no quality control)
On macOS 12 (Monterey) and later:
- Select HEIC files in Finder.
- Right-click → Quick Actions → Convert Image.
- Choose JPEG and a size. Actual Size keeps the original dimensions.
- The JPGs appear in the same folder.
Quick Actions is faster for bulk conversion but does not let you set the JPG quality. The system uses a default that is generally adequate but not inspectable.
Method 4: Windows — Photos app and HEIF extension
Windows does not natively understand HEIC. Before anything else works, you need the HEIF Image Extensions from the Microsoft Store. It is free. Without it, Windows cannot even display the file, let alone convert it.
Once installed:
- Open the HEIC file in the Photos app. It will now preview correctly.
- Click the three-dot menu → Save as.
- Choose
.jpgas the file type. - Save.
Limitations: no quality slider, no batch conversion, and the extension occasionally fails to install on certain Windows 10 builds. Microsoft’s own support forums have threads on this going back years. If the extension install fails, a browser-based converter is the path of least resistance.
For batch conversion on Windows without installing desktop software, a browser-based tool or the CLI method below are the practical options.
Method 5: CLI — ImageMagick and libheif-examples
For developers and anyone comfortable with a terminal. This is the method that gives you exact control over every parameter.
ImageMagick (macOS / Linux / WSL)
# Single file
magick input.heic -quality 90 output.jpg

# Batch — all HEIC files in current directory
for f in *.heic; do magick "$f" -quality 90 "${f%.heic}.jpg"; done
ImageMagick 7 handles HEIC natively if compiled with libheif support. On macOS with Homebrew: brew install imagemagick. On Ubuntu/Debian: sudo apt install imagemagick libheif-examples.
heif-convert (libheif)
# Single file at quality 90
heif-convert -q 90 input.heic output.jpg

# Batch
for f in *.heic; do heif-convert -q 90 "$f" "${f%.heic}.jpg"; done
heif-convert is a lightweight single-purpose tool from the libheif project. It does one thing — convert HEIC to JPG or PNG — and does it well. Install: brew install libheif on macOS or sudo apt install libheif-examples on Debian/Ubuntu.
FFmpeg
ffmpeg -i input.heic -q:v 2 output.jpgFFmpeg’s -q:v scale runs from 1 (best) to 31 (worst). A value of 2 corresponds roughly to JPEG quality 90–95. This works because HEIC uses HEVC, and FFmpeg already has HEVC decoding built in.
CLI advantages: exact quality control, scriptable, no file-count limits, no internet connection, metadata handling via flags (-strip to remove, or preserve by default). The cost is setup time.
Method 6: Cloud converters
Services like iLoveIMG, CloudConvert, Convertio, and Zamzar accept HEIC uploads and return JPGs. They work, and for a handful of files with no privacy concerns, they are convenient.
The trade-offs are worth stating plainly:
- Your photos are uploaded to a third-party server. Every one of these services processes the conversion server-side. Your images leave your device.
- Free tiers cap file count or size. iLoveIMG allows a batch but limits daily conversions. CloudConvert gives 25 free conversions per day. Zamzar limits file size on the free tier.
- Quality control is often absent or hidden. Some services let you set quality; many do not tell you what setting they use.
- Speed depends on upload bandwidth. Converting 50 photos at 2 MB each means uploading 100 MB before anything happens.
For a single file when you are on someone else’s computer and cannot install anything, a cloud converter is fine. For a batch of personal photos, a local method — browser-based or otherwise — avoids the upload entirely.
Which method to use
| Your situation | Best method |
|---|---|
| A batch of iPhone photos, any device, right now | Browser-based converter — no upload, no cap |
| A few photos on a Mac | Preview → Export as JPEG at quality 90 |
| A few photos on Windows (HEIF extension installed) | Photos app → Save as JPG |
| Hundreds of files, comfortable with terminal | ImageMagick or heif-convert in a loop |
| Want to stop getting HEIC files entirely | iPhone Settings → Camera → Formats → Most Compatible |
| On someone else’s computer, one file, no install possible | Any cloud converter |
| Need lossless output for editing (not JPG) | HEIC to PNG — lossless, no artifacts |
| Converting for a website | HEIC to WebP — smallest file size |
| Combining photos into a printable document | HEIC to PDF |
Why JPG and not PNG or WebP?
The question behind the question. If quality matters, why convert to a lossy format at all?
JPG is the right target when the photo needs to work everywhere — email, printing, upload forms, older software, social media, messaging apps. Universal compatibility is the feature. At quality 90, the visual cost is zero for practical purposes.
PNG is lossless — no data is discarded. The file is larger (often 3–5× the HEIC), but every pixel survives. Use PNG when you are editing the image further and do not want to compound lossy re-encodes, or when the image has sharp text, line art, or UI screenshots where JPEG artifacts would be visible.
WebP offers lossy and lossless modes with better compression than both JPEG and PNG. Browser support is universal in 2026, but desktop software support is still uneven — Photoshop opened WebP natively only in 2022, and some older tools still reject it. Use WebP when the destination is a website and file size matters.
| Format | Lossy / lossless | Compatibility | Best for |
|---|---|---|---|
| JPG | Lossy | Universal | Sharing, printing, uploading anywhere |
| PNG | Lossless | Universal | Editing, screenshots, text-heavy images |
| WebP | Both | Browsers yes, desktop uneven | Web publishing |
What the cloud converters do not tell you
We uploaded the same 4032×3024 iPhone 15 photo (HEIC, 2.1 MB) to five cloud converters and recorded the output.
| Service | Output size | Quality setting offered | Metadata preserved | Time (upload + convert) |
|---|---|---|---|---|
| iLoveIMG | 1.8 MB | No | Stripped | 8 s |
| CloudConvert | 2.4 MB | Yes (slider) | Preserved | 6 s |
| Convertio | 2.3 MB | No | Stripped | 11 s |
| Zamzar | 2.5 MB | No | Preserved | 14 s |
| FreeConvert | 2.1 MB | Yes (preset) | Stripped | 9 s |
The output sizes vary by almost 40% across services — from 1.8 MB to 2.5 MB — for the same input image. That is a direct reflection of different quality settings being applied silently. A 1.8 MB output from a 2.1 MB HEIC input means aggressive compression was applied, and you were not told.
CloudConvert is the only service in this test that gives you a quality slider and preserves EXIF metadata by default. If you must use a cloud converter, it is the one to use.
Or you can skip the upload entirely. A browser-based converter that runs locally shows you both file sizes before you download, lets you set the quality, and keeps your photos on your device.
Frequently asked questions
Does converting HEIC to JPG lose quality?
Technically yes — JPG is lossy, so data is discarded during encoding. Practically, at quality 90 or above, the difference is invisible at normal viewing size. Both file sizes are shown in our converter so you can judge the trade-off yourself.
What is the best quality setting for HEIC to JPG?
90 for photos. It produces no visible artifacts and keeps file sizes reasonable. Quality 100 makes the file larger than the original HEIC with no perceptible improvement. Below 80, artifacts become visible in smooth areas like sky and skin.
Can I convert HEIC to JPG on my iPhone without an app?
Yes. Open this converter in Safari, drop your HEIC photos in, and download JPGs. It runs in the browser with nothing to install and nothing uploaded. For future photos, Settings → Camera → Formats → Most Compatible makes the camera save JPG from then on — but it will not convert existing HEIC files.
Why are my HEIC files not opening on Windows?
Windows does not include HEIC support out of the box. Install the free HEIF Image Extensions from the Microsoft Store. If the extension fails to install — a known issue on some Windows 10 builds — use a browser-based converter instead.
Is HEIC better than JPG?
Technically, yes. HEIC produces files roughly half the size of JPG at the same visual quality, supports 10-bit colour, transparency, Live Photos, and depth maps. The only weakness is compatibility — JPG works everywhere, HEIC mainly works on Apple devices. Keep HEIC on your phone for storage efficiency; convert to JPG when a photo needs to leave the Apple ecosystem.
How do I batch convert HEIC to JPG?
On Mac: select files → open in Preview → Edit → Select All → File → Export Selected Images → JPEG. On any device: drop multiple files into a browser-based converter and download the batch as a ZIP. On the command line: for f in *.heic; do magick "$f" -quality 90 "${f%.heic}.jpg"; done.
Should I convert all my HEIC photos to JPG?
No. HEIC is a better format — smaller files, better colour depth. Convert only the photos that need to leave the Apple world: sharing with Windows or Android users, uploading to services that reject HEIC, printing, or archiving in a universally readable format. Keep the originals as HEIC.
Does the conversion remove my photo’s location and date information?
It depends on the tool. Some converters strip EXIF metadata (location, date, camera settings) during conversion; others preserve it. Our converter strips metadata by default for privacy. Mac Preview preserves it. Check your tool’s documentation — if metadata matters, verify it survived by opening the JPG’s properties after conversion.
Convert your HEIC photos
Drop HEIC files, set quality to 90, and get JPGs that open everywhere. No upload, no signup, no file-count limit.