How to Extract Frames from Video Online
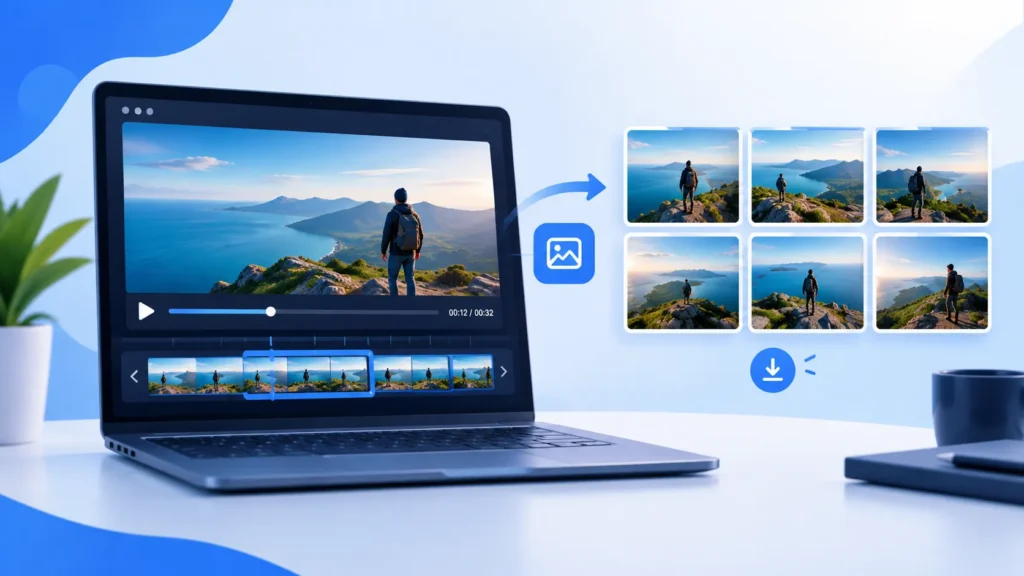
Every video file is a sequence of still images played fast enough to look like motion. A 10-second clip at 30 fps contains 300 individual frames. Sometimes you need one or more of those frames as a standalone image — a thumbnail for YouTube, a reference still for a storyboard, a training image for a machine learning dataset, or proof of what happened at a specific moment in dashcam footage.
Taking a screenshot with your operating system’s built-in tool works in a pinch, but the result usually includes the video player’s interface, compresses the image twice, and rarely lands on the exact frame you need. A purpose-built frame extractor avoids all three problems.
This guide covers five ways to extract frames from video — from the quickest browser-based option to command-line tools for developers — with a comparison table so you can pick the method that fits your situation.
Quick comparison: 5 ways to extract frames from video
Here’s how each method stacks up. The “best for” column should help you skip ahead to the right section.
| Method | Cost | Install needed? | Batch extract | Privacy | Best for |
|---|---|---|---|---|---|
| Browser tool | Free | No | Yes | Local (on-device) | Quick jobs, private video, mobile-friendly |
| VLC Player | Free | Yes | Yes (auto) | Local | Bulk extraction from long video at fixed intervals |
| FFmpeg CLI | Free | Yes | Yes (scripted) | Local | Automated pipelines, large files, precise control |
| Video editors | Paid / free trial | Yes | Manual only | Local | When you’re already editing and need a still |
| Mobile (iOS/Android) | Free | No / app | Limited | Varies | Quick single-frame grab on the go |
Method 1: Extract frames with a browser-based tool (fastest, no install)
This is the fastest path from “I have a video” to “I have the still images I need.” No software to install, no account to create, no file uploaded to a server. Everything runs inside your browser tab.
ToolsVale’s Video to Frames extractor is a good example of this approach. It uses your browser’s native video engine for MP4 and WebM files, and automatically switches to a WebAssembly-compiled FFmpeg engine for containers like MOV, MKV, and AVI that browsers can’t decode natively. The result is the same either way — frames extracted at full resolution and downloaded to your device.
Step-by-step: extracting frames in the browser
Step 1 — Load your video. Open the tool and drag your video file onto the page. MP4 and WebM files load instantly. Other formats trigger Advanced mode automatically — no manual switching needed.
Step 2 — Set capture rate and time range. Choose a capture preset: every frame, 10 fps, 5 fps, 2 fps, 1 fps, one frame every 2 seconds, or type a custom FPS value. If you only need frames from one scene, set a start and end time to skip the rest.
Step 3 — Pick an output format. Select JPG for small files, PNG for lossless quality, or WebP for a balance of both. Drag the quality slider to adjust compression for JPG and WebP.
Step 4 — Extract and download. Hit Extract frames. Once done, browse the frame grid, select the ones you want, and download them individually or as a ZIP.
Privacy check: Turn off your Wi-Fi after the page loads. If extraction still works, the tool is genuinely processing locally. ToolsVale’s extractor passes this test.
When to use this method
A browser tool is the right choice when you want to extract frames quickly without committing to a software install. It’s especially practical for private or unreleased footage, since your video never leaves your device. It also works on any operating system — Windows, Mac, Linux, even a Chromebook — and on mobile browsers for quick single-frame grabs.
Limitations
Very large video files (several GB) can strain your browser’s memory since everything runs in RAM rather than streaming to disk. For those cases, FFmpeg on the command line is more robust. The frame cap (adjustable up to 2,000 per run) also means you may need multiple passes for very long videos at high frame rates.
Method 2: Extract frames with VLC Media Player
VLC is a free, open-source media player most people already have installed. What’s less well-known is that it can automatically capture frames at a fixed interval while playing a video — useful for batch-extracting hundreds of frames from a long file without manual clicking.
How to set it up
Step 1 — Open VLC preferences. Go to Tools → Preferences. At the bottom-left, switch from “Simple” to “All” to see the full settings tree.
Step 2 — Enable the Scene Video Filter. Navigate to Video → Filters → Scene filter. Set the Recording ratio (e.g., a ratio of 24 on a 24 fps video captures one frame per second). Set the output directory path and image format (PNG or JPG). Then go up to Video → Filters and check the Scene video filter checkbox.
Step 3 — Play the video. Open and play your video normally. VLC will silently save frames to the directory you specified as the video plays.
Step 4 — Disable the filter after. Go back to Preferences and uncheck the Scene filter when you’re done — otherwise VLC will keep capturing frames from every video you play.
Common mistake: Forgetting to disable the Scene filter after extraction. VLC saves the setting globally, so it will dump frames from every video you watch until you turn it off.
When to use VLC
VLC is a solid option when you want automated batch extraction at a fixed interval from a longer video (a lecture recording, a webinar, surveillance footage) and you already have VLC installed. The setup is fiddly the first time but works reliably once configured.
Limitations
VLC extracts frames in real-time — it has to actually play through the video, so a 30-minute file takes 30 minutes to process. You can speed up playback, but seeking to exact timestamps isn’t possible. There’s also no preview grid or frame selection — you get every Nth frame dumped to a folder and sort through them afterward.
Method 3: Extract frames with FFmpeg (command line)
FFmpeg is the Swiss Army knife of video processing. If you’re comfortable with a terminal, it gives you the most precise control over frame extraction — exact timestamps, custom output resolutions, keyframe-only extraction, and easy integration into automated workflows.
Common commands
Extract a single frame at a specific timestamp:
ffmpeg -ss 00:01:23 -i input.mp4 -frames:v 1 frame.jpgPut -ss before -i for fast seeking. Placing it after -i forces FFmpeg to decode every frame from the start, which is dramatically slower on long files.
Extract one frame per second:
ffmpeg -i input.mp4 -vf "fps=1" frame_%04d.jpgExtract one frame every 5 seconds as PNG:
ffmpeg -i input.mp4 -vf "fps=1/5" frame_%04d.pngExtract only keyframes (I-frames):
ffmpeg -i input.mp4 -vf "select='eq(pict_type,I)'" -vsync vfr keyframe_%04d.jpgExtract frames and scale them down (for thumbnails):
ffmpeg -i input.mp4 -vf "fps=1,scale=320:-1" -q:v 3 thumb_%04d.jpgThe -q:v flag controls JPEG quality — 2 is highest, 31 is lowest. For thumbnails at small display sizes, 3–5 is a good range.
When to use FFmpeg
FFmpeg is the right tool when you need to extract frames from many video files in a scripted pipeline, when you want keyframe-only extraction, or when you need to process files too large for a browser. It’s also the only option here that can simultaneously transcode, resize, and extract in a single command.
Limitations
FFmpeg requires installation and some comfort with the command line. The flags aren’t intuitive — getting -ss placement wrong is one of the most common mistakes, and the difference between -frames:v and -vframes trips people up. There’s no visual preview; you work with file output and verify afterward.
Method 4: Extract frames with a video editor
If you’re already working in a video editor like DaVinci Resolve, Adobe Premiere Pro, or Wondershare Filmora, you can extract individual frames without leaving the app.
The general workflow is the same across most editors: navigate the timeline to the exact frame you want using arrow keys for frame-by-frame stepping, then use the editor’s snapshot or export-frame function to save it as a still image. In DaVinci Resolve, that’s the “Grab Still” feature in the Color page. In Premiere, it’s File → Export → Media with “Export As Sequence” checked. Filmora has a camera icon in the preview panel that saves the current frame directly.
When to use a video editor
This makes sense when you’re already editing the video and need one or two specific frames as stills — a reference shot, a thumbnail candidate, a before/after comparison. The frame-by-frame timeline gives you precise visual control over which exact frame you’re exporting.
Limitations
Video editors are heavy applications designed for editing, not batch frame extraction. Exporting 50+ frames one at a time is tedious. Most professional editors also require paid licenses. If frame extraction is your only goal, a dedicated tool is faster and lighter.
Method 5: Extract frames on mobile (iPhone & Android)
On a phone, the quickest way to grab a single frame is the built-in screenshot function — pause the video at the right moment and take a screenshot. But this captures the player’s UI (play button, progress bar, status bar) along with the frame, and the quality depends on your screen resolution rather than the video’s resolution.
For a cleaner result, use a browser-based tool on your phone. Open ToolsVale’s Video to Frames tool in Chrome or Safari, load a video from your camera roll, and extract frames at full resolution just like on desktop. The extracted images go straight to your Downloads folder without any player UI baked in.
Dedicated apps exist on both iOS and Android (search for “video to photo” in the App Store or Play Store), but most either upload your video to a server, add watermarks, or require a paid upgrade for batch extraction. A browser-based tool avoids all three.
Common use cases for extracted video frames
People extract frames from video for very different reasons, and the reason shapes which method and settings make sense.
YouTube & social thumbnails. Extract the best facial expression or product shot from your footage. One well-chosen frame outperforms an auto-generated thumbnail every time.
Storyboards & pre-production. Pull evenly-spaced frames from a reference clip to build a visual sequence. Use interval extraction (1 fps or 1 every 2 seconds) for an automatic contact sheet.
Sports & motion analysis. Step through a swing, serve, or sprint frame-by-frame to study technique. Extract every frame from a 2-second burst for the closest thing to slow motion as a set of stills.
Documentation & tutorials. Record a screen walkthrough once, then extract the exact screens you need as images for a guide, slide deck, or help doc — cleaner than re-taking screenshots.
Machine learning datasets. Extract evenly-spaced frames from raw footage to feed an image labeling pipeline. PNG output preserves pixel-exact data for training.
Security & evidence. Pull specific frames from dashcam, doorbell, or CCTV footage as clear stills for reports or records. Local processing matters here — the video doesn’t leave your device.
JPG vs PNG vs WebP — which format to save extracted frames
The output format affects file size, quality, and what you can do with the images afterward.
| Format | Compression | Typical size (1080p frame) | Best for |
|---|---|---|---|
| JPG | Lossy | 80–200 KB | Thumbnails, social media, web use, bulk extraction |
| PNG | Lossless | 1–4 MB | Design reference, ML datasets, screenshots with text, forensics |
| WebP | Lossy or lossless | 50–150 KB (lossy) | Web use where smaller file size matters, modern browser workflows |
A practical rule: reach for JPG when you need many frames or when images are headed for the web. Switch to PNG when every pixel matters — text overlays, UI screenshots, scientific imaging, or anything feeding into a processing pipeline where quality loss compounds. WebP sits in between and is a good default if everything stays in a browser workflow.
Need to convert between formats afterward? ToolsVale has JPG to WebP, WebP to JPG, and PNG to WebP converters that run in-browser with the same no-upload approach.
Tips for sharper, cleaner extracted frames
Extract more frames than you need, then select
Don’t try to land on the perfect frame in one shot. Extract at a higher rate (5 fps or even every frame) over a short range, then browse the grid and pick the sharpest result. It takes seconds and avoids the frustration of pausing a player and never quite hitting the right moment.
Trim the time range first
If you only care about one scene in a 20-minute video, set a start and end time before extracting. This keeps the frame count manageable and the output folder clean.
Watch for motion blur
Blurry frames aren’t a tool problem — they’re a motion blur problem. The camera or subject was moving when that frame was captured. Fast action at low frame rates (24 fps) produces more motion blur per frame than the same action at 60 fps. If your source allows, shoot at a higher frame rate when you know you’ll want stills later.
Use the right quality setting
For JPG output, a quality setting of 85–92% is usually the sweet spot — visually indistinguishable from 100% at a fraction of the file size. Below 75%, compression artifacts become noticeable, especially around text and hard edges.
After extraction: crop and compress
Extracted frames are full-resolution. If you need them smaller for a blog or social post, run them through Crop Image or Compress Image — both process locally in your browser, same as the frame extractor.
Frequently asked questions
Can I extract frames from a video without installing software?
Yes. Browser-based tools like ToolsVale’s Video to Frames extractor process your video entirely on your device using your browser’s built-in video engine. No download, no install, no signup needed — just open the page, drop your video, and capture frames.
What’s the best format to save extracted frames — JPG, PNG, or WebP?
It depends on the use case. JPG is best when file size matters (thumbnails, social media, web) — it’s typically 10× smaller than PNG at the same resolution. PNG is best for lossless quality where every pixel counts (design reference, ML training data, forensic stills). WebP offers a middle ground — smaller than JPG at equivalent quality, with optional transparency.
How many frames are in one second of video?
It depends on the video’s frame rate. Most smartphone video is 30 fps, which means 30 frames per second. Cinematic footage is usually 24 fps. Action cameras and gaming recordings can be 60 fps or even 120 fps. A 10-second clip at 30 fps contains 300 individual frames.
Is it safe to use an online tool for private or confidential video?
Only if the tool processes the video locally in your browser. Tools that upload your file to a server mean your footage temporarily exists on someone else’s infrastructure. Browser-based extractors that use on-device processing — like ToolsVale — never upload the file. You can verify this by disconnecting from the internet after the page loads; if extraction still works, it’s genuinely local.
Why are my extracted frames blurry?
Blurry frames are almost always caused by motion blur in the source video — the camera or subject was moving fast when that particular frame was recorded. To get sharper frames, extract at a higher rate so you have more candidates to choose from, or use manual frame stepping to advance one frame at a time and pick the sharpest one. Shooting at higher frame rates (60 fps instead of 24) also helps if you control the source.
Can I extract frames from YouTube or TikTok videos?
You can’t paste a platform URL directly into most frame extractors. You’d first need to download the video file to your device, then load it into the extraction tool. Keep copyright in mind — this workflow should be used for your own content or material you have permission to use.
What’s the difference between a screenshot and an extracted frame?
A screenshot captures whatever is on your screen, including the video player’s UI elements (play button, progress bar, browser chrome). It’s also limited to your screen’s resolution. An extracted frame pulls the raw pixel data directly from the video file at the video’s native resolution — no UI overlay, no double compression, and an exact match to what the camera recorded.