How to Extract High-Resolution Frames from 4K Video
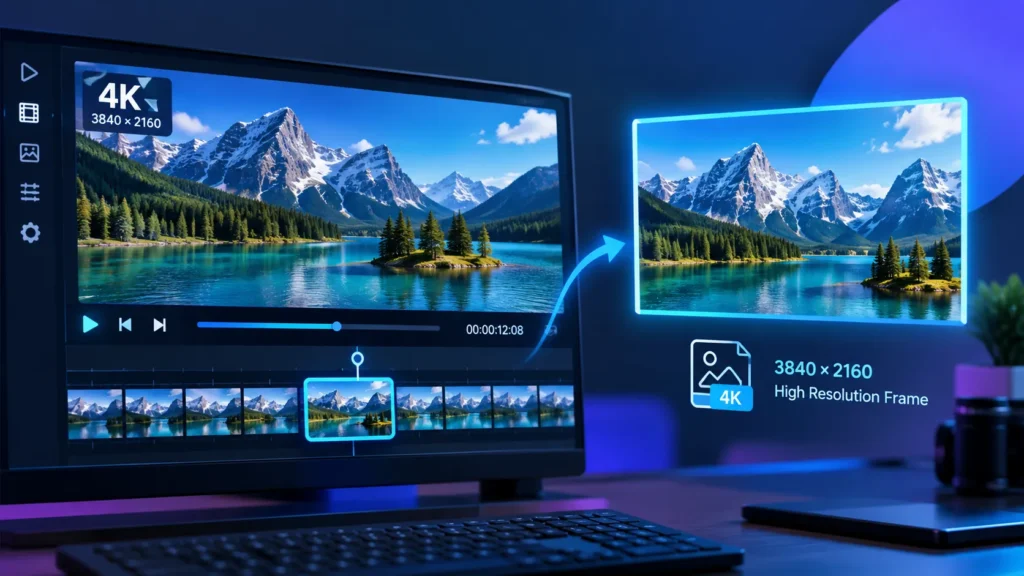
You shot a gorgeous 4K video — 3840×2160 pixels, crisp detail, perfect lighting. Now you need a still image from it. You pause the video, take a screenshot, and the result looks soft, pixelated, and nothing like what you saw on screen.
This happens to nearly everyone, and the reason is not your video. It is your extraction method. Standard screenshots, most free online tools, and even some paid software silently destroy the quality you captured. They downscale resolution, compress colors, bake in UI overlays, or upload your footage to a server that strips it down before sending anything back.
This guide explains exactly why that happens and how to extract full-resolution, native 4K still frames — 8.3 megapixels per image — without any quality loss. No software to install, no uploads to a server, and no watermarks on the output.
Need frames right now? Open the free ToolsVale Video to Frames tool — it extracts uncompressed 3840×2160 PNG stills directly in your browser with zero server uploads.
The 4K Frame Math: Why Your Video Stills Look Blurry
Before reaching for any tool, you need to understand what a 4K video frame actually is — and why the frame you extract often looks worse than the video you watched.
4K Native Resolution: 3840×2160 = 8.3 Megapixels
A single frame from a standard 4K UHD video contains 3840 × 2160 = 8,294,400 pixels. That is approximately 8.3 megapixels. For context, that is roughly equivalent to the resolution of a mid-range DSLR camera from the early 2010s. It is enough to produce a clean print at 300 DPI up to about 13 × 7 inches — perfectly usable for social media, thumbnails, presentations, and small prints.
Here is a quick resolution reference for common video formats:
| Video Resolution | Pixel Dimensions | Megapixels | Max Print Size (300 DPI) |
|---|---|---|---|
| 1080p (Full HD) | 1920 × 1080 | ~2.1 MP | 6.4 × 3.6 inches |
| 1440p (2K) | 2560 × 1440 | ~3.7 MP | 8.5 × 4.8 inches |
| 4K UHD | 3840 × 2160 | ~8.3 MP | 12.8 × 7.2 inches |
| DCI 4K (Cinema) | 4096 × 2160 | ~8.8 MP | 13.7 × 7.2 inches |
| 8K UHD | 7680 × 4320 | ~33.2 MP | 25.6 × 14.4 inches |
The resolution is there. So why do extracted frames so often look bad?
Why OS Screenshots Destroy 4K Quality
When you press Print Screen, Cmd+Shift+4, or use the Snipping Tool, you are not capturing the video frame. You are capturing your screen — which is an entirely different thing. Three problems happen at once:
Display scaling. Most modern monitors run at 125%, 150%, or 200% scaling. A 4K video playing in a browser window on a 1080p monitor is being displayed at a fraction of its native resolution. Your screenshot captures what the monitor shows, not what the video file contains. The result is a 1920×1080 image — or worse — from a 3840×2160 source.
UI overlay contamination. Play buttons, progress bars, volume controls, browser chrome, and video player skins all get captured in the screenshot. Even a clean pause screen usually shows a control bar and window borders that have nothing to do with your footage.
Color profile mismatch. Your monitor applies its own color profile, brightness, and gamma curve. A screenshot captures the display output, not the original pixel data from the video file. This means subtle color shifts that compound if you edit the image afterward.
The Silent Downscaling Trap in Online Converters
Many free online video-to-frame tools look like they handle 4K — they accept a 4K file, they show a preview, and they let you click “extract.” But behind the scenes, they upload your video to a server, downscale it to 1080p or 720p to save bandwidth and processing power, and return frames at a fraction of the original resolution.
You receive a JPG file that looks fine at thumbnail size. But open it at 100% zoom and it is a 1920×1080 image (or smaller) with visible compression artifacts — from a source that was 3840×2160.
The giveaway: check the pixel dimensions of any frame the tool exports. If your source is 4K and the output is anything less than 3840×2160, the tool downscaled your footage.
How to Actually Extract Full-Resolution 4K Frames
There are three practical approaches to extracting 4K frames without quality loss. Each has trade-offs depending on your technical comfort level and how many frames you need.
Method 1: Browser-Based Extraction (No Upload, No Install)
Browser-based tools that process video locally on your device — using HTML5 Canvas and WebAssembly — are the fastest path for most people. The key distinction is “locally” — the video file stays on your machine, the browser decodes it frame-by-frame, and the resulting image is drawn from the native video buffer, not from a display-scaled preview.
ToolsVale Video to Frames works this way. Here is how to use it for 4K extraction:
- Open the tool and drop your 4K video file. MP4 and WebM load instantly using your browser’s native decoder. MOV, MKV, and AVI automatically switch to Advanced mode, which uses an FFmpeg WebAssembly engine to decode formats your browser cannot play natively
- Set your capture rate. Choose “Every frame” for frame-by-frame analysis, or pick a fixed rate (1 fps, 2 fps, 5 fps) to sample at intervals. You can also set a custom rate and limit extraction to a specific time range so you are not processing the entire video
- Choose PNG as your output format. PNG preserves every pixel at the source resolution with zero compression loss. JPG and WebP are available if file size matters more than pixel accuracy — more on this in the next section
- Extract and download. Preview the captured frames in a grid, select the ones you want, and download them individually or as a ZIP
Every extracted frame matches the video’s native resolution. A 3840×2160 source produces 3840×2160 images. Nothing is uploaded, nothing is downscaled, and no watermarks are added.
Method 2: FFmpeg (Command Line)
FFmpeg is the most powerful option if you are comfortable with terminal commands. It gives you complete control over frame timing, output format, and quality settings.
Extract a single frame at a specific timestamp:
ffmpeg -ss 00:01:30 -i input.mp4 -frames:v 1 -q:v 1 frame.pngExtract one frame per second as lossless PNG:
ffmpeg -i input.mp4 -vf "fps=1" frames/frame_%04d.pngExtract only keyframes (I-frames) for the sharpest possible stills:
ffmpeg -i input.mp4 -vf "select='eq(pict_type,I)'" -vsync vfr keyframes/kf_%04d.pngThe keyframe extraction command is worth knowing because it targets the frames in your video that carry the most complete image data — more on why this matters below.
Trade-offs: FFmpeg requires installation, runs in a terminal, and has a learning curve. But for batch processing thousands of frames or scripting into an automated pipeline, nothing matches it.
Method 3: Desktop Video Editors (VLC, DaVinci Resolve, Premiere Pro)
If you already have a video editor installed, you can extract frames without switching tools:
VLC: Enable the Scene Video Filter under Preferences → Video → Filters → Scene video filter. Set the recording ratio (e.g., every 24th frame), choose PNG as the format, and play the video. VLC saves frames to a designated folder. Remember to disable the filter afterward — VLC will otherwise keep extracting frames from every video you play.
DaVinci Resolve: Import your video into the timeline, navigate to the frame you want, then use File → Save Still Frame. Export at full resolution as PNG or TIFF.
Trade-offs: Desktop editors handle 4K and 8K footage reliably with GPU acceleration, but they are heavyweight applications designed for editing, not quick frame extraction. For pulling a few stills from a single clip, a browser-based tool is faster. For integrating frame extraction into a professional editing workflow, these are the right choice.
Quick Comparison: Which Method Fits Your Workflow
| Factor | Browser-Based (ToolsVale) | FFmpeg (CLI) | Desktop Editor |
|---|---|---|---|
| Setup time | Zero — open and use | Requires install + CLI knowledge | Requires heavy app install |
| 4K support | Full native resolution | Full native resolution | Full native resolution |
| Batch extraction | Up to 2000 frames per run | Unlimited | Manual per-frame |
| Privacy | 100% local (no upload) | 100% local | 100% local |
| Output formats | PNG, JPG, WebP | PNG, JPG, WebP, TIFF, BMP | PNG, JPG, TIFF |
| Best for | Quick 1–2000 frame pulls | Automated pipelines, huge batches | Editing + extraction together |
PNG vs JPG vs WebP: Choosing the Right Export Format
This decision matters more than most guides let on. The format you export to determines whether you keep or lose the quality you just extracted.
PNG: Lossless, Full Quality
PNG uses lossless compression. Every pixel in the extracted frame is preserved exactly as it existed in the video buffer — no color rounding, no macroblocking, no detail loss. A single 4K PNG frame is typically 5–15 MB depending on scene complexity.
Use PNG when:
- You plan to edit the image afterward (Photoshop, Canva, Figma) — starting from a lossless source preserves your editing headroom
- You need a high-quality YouTube thumbnail that will survive YouTube’s own compression
- You are extracting frames for print use
- You need pixel-accurate stills for technical analysis, machine learning datasets, or forensic review
JPG: Smaller Files, Visible Compression
JPG uses lossy compression. It reduces file size dramatically — a 4K JPG at quality 85 might be 500 KB to 1.5 MB — but it introduces compression artifacts. These show up as slight color banding in gradients, softening of fine detail, and “macroblocking” (tiny square patches visible at 100% zoom, especially in areas with subtle color transitions like sky or skin tones).
Use JPG when:
- You need many frames and storage or bandwidth is limited
- The images will only be viewed at small sizes (social media feeds, messaging apps)
- You are building a quick storyboard or reference sheet where visual fidelity is secondary
WebP: The Middle Ground
WebP offers better compression than JPG at the same visual quality, and it supports both lossy and lossless modes. A lossy WebP at equivalent visual quality to a JPG is typically 25–35% smaller in file size.
Use WebP when:
- The frames will be published on a website where page speed matters
- You want smaller files than JPG without the dramatic quality loss
- You extracted as PNG and now need to convert to WebP for web publishing
Practical rule: extract as PNG first. You can always convert PNG to JPG or WebP later. You cannot recover quality lost by exporting as JPG from the start.
Why Some 4K Frames Look Sharper Than Others (I-Frames vs P-Frames)
This is the detail that most frame extraction guides skip entirely, and it explains one of the most common complaints: “I extracted two frames from the same video and one looks great while the other looks blocky.”
Modern video codecs like H.264 and H.265 (HEVC) do not store every frame as a complete image. Instead, they use three types of frames:
I-frames (Intra-coded frames) — complete, self-contained images compressed independently, like a standalone photograph. These carry the highest quality and sharpest detail.
P-frames (Predictive frames) — store only the differences from the previous frame. They rely on motion estimation and contain less complete image data. When extracted as a still, they can show compression artifacts that were invisible during playback.
B-frames (Bidirectional frames) — reference both previous and future frames. They carry the least independent image data and typically produce the lowest-quality stills when extracted.
During normal video playback, your player reconstructs P-frames and B-frames on the fly by combining them with nearby I-frames. The result looks smooth and sharp. But when you extract a single P-frame or B-frame as a still image, you get the stored data for that frame alone — which may include visible compression blocks, ghosting from motion estimation, or color approximations that were designed to be invisible during playback but are obvious in a static image.
What You Can Do About It
If you control the extraction: Scrub through the timeline and look for frames with the sharpest detail and cleanest edges. These are likely I-frames (keyframes). Good frame extraction tools decode the video properly, which reconstructs even P-frames and B-frames correctly — but I-frames will still yield the best static results because they were compressed as standalone images.
If you control the camera settings: Record in All-Intra (ALL-I) mode if your camera supports it. In ALL-I recording, every frame is an I-frame — no predictive compression, no motion estimation. The file sizes are significantly larger, but every frame extracts at maximum quality. ProRes and DNxHR codecs work similarly. This is the professional approach when you know you will be pulling stills from footage.
The Motion Blur Problem: Why Sharp Video ≠ Sharp Stills
This is the other major quality killer that has nothing to do with your extraction tool.
Video and photography use fundamentally different shutter speed strategies. In filmmaking, the standard practice is the 180-degree shutter rule: your shutter speed should be roughly double your frame rate. For 24 fps video, that means 1/48 or 1/50 second. For 60 fps, it is 1/120 second.
This creates natural motion blur that looks smooth and cinematic during playback — but it means every frame where something moves contains intentional blur. A hand gesture, a head turn, a walking subject — all of these will be blurred to some degree in each individual frame.
When you extract that frame as a still image, the motion blur that felt natural in video now looks soft and unfocused. This is not a tool problem. It is a physics problem.
How to Get Motion-Sharp Frames
If you have not recorded yet: Increase your shutter speed for scenes where you plan to extract stills. Use 1/250, 1/500, or higher. The video will look slightly staccato during playback — less of that smooth cinematic motion — but each individual frame will be dramatically sharper. This trade-off is worth making for footage where stills matter more than motion smoothness.
If the footage is already recorded: Look for moments of relative stillness — pauses between actions, held poses, static scenes. These frames will have minimal motion blur regardless of shutter speed. A person standing still in a conversation, a product sitting on a table, a landscape with no camera movement — these yield the sharpest stills from standard footage.
Higher frame rates help: 60 fps footage uses a faster shutter speed (1/120) than 24 fps footage (1/48), so each frame has less motion blur. If you shoot with an action camera (GoPro, DJI) or iPhone at 4K/60fps, your extracted stills will typically be sharper than those from cinematic 4K/24fps footage.
4K Video Still vs DSLR Photo: Know the Difference
A common expectation is that a 4K video frame should look as good as a photo from a dedicated camera. It will not, and understanding why helps you set realistic expectations.
| Factor | 4K Video Frame | DSLR/Mirrorless Photo |
|---|---|---|
| Resolution | 8.3 MP (3840×2160) | 24–61 MP typical |
| Color depth | 8-bit (most consumer), 10-bit (pro) | 12–14 bit (RAW) |
| Compression | H.264/H.265 inter-frame lossy | RAW (lossless) or minimal JPEG |
| Motion blur | Present (by design) | Minimal (fast shutter speed) |
| Dynamic range | Limited by codec bit depth | Wide (especially in RAW) |
| Edit flexibility | Low (8-bit banding on heavy edits) | High (14-bit RAW tolerates exposure changes) |
A 4K video frame is excellent for thumbnails, social media, web content, presentations, reference images, storyboards, and small-to-medium prints. It is not a replacement for a dedicated still photograph when you need maximum resolution, editing flexibility, or large-format print quality.
That said — for YouTube thumbnails specifically, a well-chosen 4K frame at 3840×2160 is more than sufficient. YouTube displays thumbnails at 1280×720, so you have nearly three times the resolution needed, even before any cropping.
Practical Workflows by Use Case
YouTube Thumbnail from 4K Footage
- Open your 4K video in ToolsVale Video to Frames
- Set capture rate to 1 fps or scrub to the exact moment you want
- Export as PNG at full 3840×2160 resolution
- Open the PNG in your thumbnail editor (Canva, Photoshop, Figma) — add text, overlays, and branding
- Export the final thumbnail as JPG or WebP at 1280×720
Starting from a full-resolution PNG gives your editor the maximum pixel data to work with, which means cleaner text edges, better crop flexibility, and sharper detail after downscaling.
Social Media Carousel from Video Reel
- Set a time range covering the section you want to feature
- Use 1 fps or 0.5 fps capture rate to sample key moments
- Download all frames as a ZIP
- Select the strongest 5–10 images for your carousel
- Crop to square (1080×1080) or 4:5 (1080×1350) for Instagram
Storyboard or Reference Sheet
- Set capture rate to every 2–5 seconds for broad coverage
- Export as JPG at quality 85 (file size matters more here)
- Arrange selected frames into a grid for client review or pre-production planning
Machine Learning or Technical Analysis
- Use “Every frame” mode for complete frame-by-frame extraction
- Export as PNG (lossless) for training data integrity
- Set the frame cap to 2000 per run and process in batches for long videos
Frequently Asked Questions
How many megapixels is a frame from a 4K video?
A standard 4K UHD frame (3840×2160) contains approximately 8.3 megapixels. DCI 4K (4096×2160, used in cinema) contains approximately 8.8 megapixels. Both are sufficient for web use, social media, presentations, and small to medium prints at 300 DPI.
Does taking a screenshot of a 4K video give me a 4K image?
No. A standard screenshot captures your screen at its display resolution, not the video’s native resolution. On most setups, this means a 1080p or 1440p image from a 4K source — plus any visible UI elements like play buttons and progress bars. To get a true 4K still, you need a tool that reads the video buffer directly, such as ToolsVale Video to Frames.
Why does my extracted frame look blurry even though the video is sharp?
Two likely causes. First, motion blur: video is filmed with shutter speeds designed for smooth playback (1/50 or 1/120 second), which creates intentional per-frame blur on moving subjects. Second, inter-frame compression: H.264 and H.265 codecs use predictive frames (P-frames and B-frames) that carry less image data than keyframes (I-frames). Both of these produce frames that look fine during playback but soft as still images.
Should I export video frames as PNG or JPG?
Export as PNG when quality matters — for editing, thumbnails, print, or any workflow where you might crop or adjust the image. Export as JPG when file size matters more — for quick storyboards, reference sheets, or when you are extracting hundreds of frames and storage is a concern. You can always convert PNG to JPG or convert to WebP later, but you cannot recover quality lost by exporting as JPG from the start.
Can I extract 4K frames from iPhone or GoPro footage?
Yes. iPhones record in H.265 (HEVC) at 3840×2160, and GoPro cameras record in H.264 or H.265 at 4K. Both formats are supported for frame extraction. Transfer the video file to your computer and use a browser-based extractor or FFmpeg. For iPhone MOV files specifically, ToolsVale’s Advanced mode handles the format automatically using WebAssembly-based decoding.
Is there a quality difference between extracting from H.264 vs H.265 video?
H.265 achieves similar video quality at roughly half the file size of H.264, which means it uses more aggressive compression. Individual frames from H.265 video may show slightly more compression artifacts than H.264 at the same bitrate. However, a properly decoded frame from either codec will be at native 4K resolution. The quality difference in extracted stills is usually marginal and depends more on the original recording bitrate than the codec itself.
Can I extract frames without uploading my video to a server?
Yes. Browser-based tools that process video locally — using HTML5 Canvas and WebAssembly — never upload your file. The video stays on your device throughout the entire extraction process. You can verify this by disconnecting from the internet after the tool page loads and confirming that extraction still works.